 |
||
|
|
| |
||
|
|
Tuesday December 4, 2012
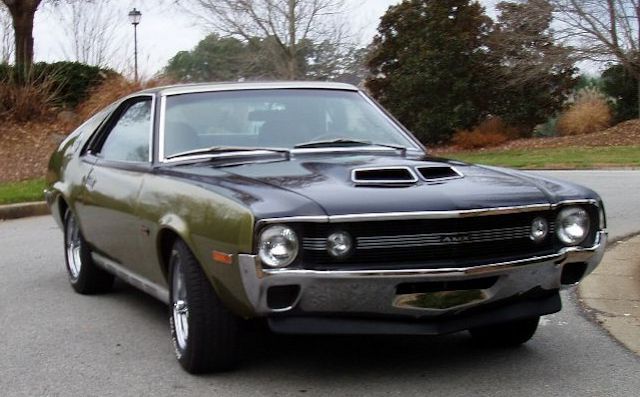
It has been several weeks since I updated this but I reallly haven't done anything. But I have purchased several things and am starting to put them on the car. One of the things I had done to my AMX back in 1970 was add a Z28 front spoiler. I had no clue that AMC had what was called a Group 19 spoiler, but it was a racing part not designed for street use. Now there are several versions of it being produced and I bought one of these reproductions. The vender said he had never attempted to mount one on a '70 AMX but research said it should work. I'm not real sure exactly where this should sit, but logic tells me it should sit up against the bumper to really be affective as spoiler. This one looks like it sits behind the bumper and redirects air to the radiator. That is not the affect or the look I want. Much like my Z front air damn I had to do some modification to get exactly what I want. The supplied end brackets had to be extended and I cut off the bosses on each side of the bumper, no clue why they are even there unless they are supposed to be tow hooks. The spoiler now sits very close to the bumper except for right in the middle. I may add something to take up that space but I am not going to start modifying the fiberglass.
December 12, 2012
Let's see, I said in the above paragraph that I would not start modifying the fiberglass, but of course I did. In order to get the spoiler to sit against the bumper and act like a real spoiler I had to add some fiberglass. In the center it sat back about 2 inches and that gap tapered off to nothing about 3/4 of the way toward each end. I used the trusted aluminum tape to fill the gap and then laid on a few layers of fiberglass over the tape. After it cured I pulled it all out and trimmed it to fit while still allowing the spoiler to easily be removed. When I was satisfied with the fit and function I screwed the new piece to the spoiler.
December 18, 2012
Man I am getting lazy. I finally got off my lazy butt and installed the new Edelbrock valve covers. I am thinking about making brackets that will hold the wire looms that the PO had on the stock valve covers, they are pretty cool. I should be able the adhere them with 3M tape over the Edelbrock logo.
December 20, 2012
I picked up a new dash plastic to address the broken one in my car now. I need to pull the dash apart anyway to attempt to find out why the tachometer is not working so this is a good time to fix everything. I also got new faux wood for the dash to replace the worn out and bent one on there now. The new plastic is red so I painted it black. Putting on the faux wood is a scary thing. The entire back of it is peel and stick, which means you have one shot at getting it on right!
Friday December 21, 2012
Today I made the brackets to hold my spark plug wire looms. I was thinking about having them powder coated and may still do that, but for now they are painted black. After I install them I will also see about adding some aluminum runners to mimic the fins on the valve covers, not sure if I can pull that off. Today is supposed to be the end of the world according to the Mayans so I'm not sure why I bothered with this, LOL.
Monday December 24, 2012
I have never liked mechanical cooling fans. So I picked up a dual Spal fan setup made for the AMX. It has an aluminum frame the bolts up using the existing radiator mounting. I also got a SPA-185-TS Spal thermal switch to turn on the fans at 185 degrees. To power the fans I will use two 30A relays mounted on the shock tower close to the battery. I pulled the stock fan and shroud out and the new fans mounted. Of course I discovered my supply of electrical push-on connectors for the relays has been exhausted and its Christmas Eve so this project is on hold. There was a huge debate on the AMC message board about where to install the thermal switch. Some say bottom radiator hose, some say the upper radiator hose, some say in the engine block. I have discovered AMC used a switch in the thermostat housing for a heat activated smog device. That device is not on my engine and the hole for it is plugged so I decided to use that.
January 2, 2013
The holiday season was full of commitments, travel and a lot of other stuff that kept me away from the car. But I finally made it out the garage to finish the cooling fans install. I installed the thermal switch in the thermostat housing, ran the wire through the wiring harness to the coils of the two relay's I mounted on the passenger side shock tower. I jumped the hot side of the starter relay through a 50A mega fuse to the other coil connection and NO side of the two fan relays. The other side of the NO connections get wired to each fan. The grounds for the fan are tied to one of the shroud/ radiator mounting bolts. So when the water temperature hits 185 degrees the thermal switch closes and sends ground to the relays and the fans turn on. When the temperature drops to 180 the switch opens and the fans stop, pretty cool, no pun intended. I ran power for the relays off the switched +12v side of the started relay so when the car is turned off the fans turn off too.
January 10, 2013
After I swapped out the dead alternator/voltage regulator for a GM 3 wire the tachometer has not worked, maybe I removed a wire I should not have. Then again I am not sure the tach ever worked. I have never seen a current sensing tachometer like AMC used, so I am in new territory here. The schematic shows a pink wire from the old voltage regulator connected to the starter relay along with the blue wire from the tachometer. But a post on the AMC message board told me my tachometer circuit is wired wrong. I had the resistive switched wire and one side of the tachometer going to the coil and the other side of the tachometer going to the starter solenoid "I" terminal. The resistive wire should be connected to the solenoid with the blue wire. That way current will past through the tachometer and on to the coil. I moved the resistive wire and the tachometer works! Now assuming the tachometer is accurate it looks like I have 3.54 rear gears. I had a feeling they were not the stock 3.15.
January 16, 2013
Now that I figured out how to make the tachometer work a second issue that has been bugging me for a while needed to be addressed. This car is running a Mallory coil and electronic distributor ignition system. According to Mallory's instructions there is supposed to be a ballast resistor between the coil and the distributor to protect the ignition module. So I picked up the ballast resistor and installed it. While I was in there I decided to swap out the metal wrapped spark plug wires the car came with. I have never seen these before but Summit sells them and they aren't cheap. But after a buddy of mine said he got shocked when he touched one when the car was running I thought new ones would be good. I have Taylor wires on the Z so I went with them on this car too.
January 28, 2013
For some reason I am having a tough time getting motivated lately. But I have changed a few minor things on the car in the past couple weeks. I added a LED on the dash to tell me when the electric cooling fans are running. I picked up a shifter bezel to bring it closer to a new look. I painted it semi-gloss black and then painted the old one graphite, not sure which one I like best but am leaning toward the graphite color.
January 30, 2013
AMC, among other car manufacturers back in the '70s, chose to not keep the front and rear tracks the same. The AMX front track is 59.1" while the rear is 56.6". Personally I do not like that look and feel it is also detrimental to the car's handling. To help alleviate this I have installed 1" spacers on the rear axels which will bring the tracks closer to the same. These brought out the wheels out close to the fender lip but there is still ample clearance. Of course as always this turned out to NOT be a simple bolt on. The lugs for mounting the spacer to the axel are correct as are the wheel studs. The stock studs on the axels are short enough that I didn't have to cut them, that's good. Thinking I was all set I put the first spacer on, well almost on. Turns out these spacers have a camphor on the back but the AMX axel flange is 3 mm too big! Not a big deal, using a mini grinder I was able to "adjust to fit" the spacer and all is good.
February 5, 2013
Muscle cars from back in the day sat very high compared to today's cars stance. The AMX stance certainly fits into that old school look and I want to drop it some. There are several ways to adjust the front stance, one of which would be ideal but is costly. Freakride makes a really nice coilover front suspension using rack and pinion steering that would allow fine tuning of the ride height and provide a much better handling car. But since this car is going to be a simple street car I can't justify the close to $2000 price tag. The second option is to either cut the front springs or get new ones made, both of these options have a down side. Cutting springs is always a hit or miss option, cut too much and the car sinks into the weeds and the ride goes with it. Getting new ones made is also not an exact science, there are too many variables involved. Many AMX owners before me used spindle drop plates to achieve a 1 5/8" - 2.0" front drop. This is the way I am going. One of the AMC message board regulars graciously offered to get these made for us and a very reasonable price. I will wait until I get the front lowered before deciding on whether to lower the rear too. There are lowering blocks available for this.
February 10, 2013
I have decided to remove the headers that were on this car when I bought it. There were what is referred to a "free flow" manifolds in the trunk when I got the car. These were not the stock manifolds but were used on the newer 401 engines. Searching around the internet for AMX stuff I stumbled on what was called factory manifold bolts. These things have hollow centers! I don't remember back in the day when I installed headers on my original AMX if the bolts were weird like this. So I posted on the AMC forum looking for an answer as to whether I really need these, they aren't cheap. Turns out they were an upgrade AMC initiated late in 1970 to address loosening manifold bolts, interesting.
February 14, 2013
The drop plates came in today. Brian from the AMC message board made the plates and they look awesome. They came with all the hardware so I won't have to chase all that down. The drop plate installation looks straight forward but ya know how that goes. Hopefully I won't run into any weird problems. I guess its time to take the AMX off the road again. Not that I've been able to drive it much in the last month due to all the rain we've been getting.
February 18, 2013
I started installing the drop plates today. As usual things have not gone quite as planned. I pulled the wheel, took off the caliper, took off the spindle nut and pulled the hub, rotor and removed the 4 bolts that hold on the spindle, the caliper mount and brake shield. All was going well. Without instructions I was sort of left to figure out which of all this hardware goes where. I have a couple pictures I downloaded as reference so it wasn't too difficult. The two mounting bolts that thread into the drop plate from the back were my first issue. One is too long, the other too short. Then there are two bolts that slide through the plate that will also go through the brake mount, spindle and the brake shield. But the heads are too big to clear the bracket on the car. A little grinding on the bracket and the heads of the bolts and they fit. Next the caliper mount will not allow the plate to sit all the way down against it. I really didn't want to grind on the caliper mount so I ground a little off the corner of the plate and notched another area to male it fit. I am wondering if all these issues are because this car has updated brakes from a '75 or newer AMC car, the pictures I downloaded don't look like my car exactly.
February 19. 2013
Day two started without success in an attempt to find the correct length bolts. Not a big deal. I cut the long bolt and used one of the stock bolts which I also cut for the too short one. To get bolts that pass though the plate that were interfering with the bracket I mounted the caliper mount to the plate before installing the plate, it was just easier. I also found it necessary to remove the sway bar mounting for clearance to install one of the through bolts. After all that I got everything bolted up and torqued to 65 ft/lbs. Before I put the hub and caliper back on I thought I would clean up some of the suspension stuff and paint it while all this is apart. I will move on to the other side first, this should be easier since I know the pitfalls now.
February 20, 2013
As my brother always says, just another example of the famous Boyd luck! I got the driver side finished and attacked the passenger side today. Turns out this car has two different steering knuckles! The one on the passenger side did NOT have an issue with the through bolts like the driver side did. I did have to grind some of the plate again to get it to sit flat on the caliper mount, not a big deal. The passenger side went on rather quickly compared to the nightmare on the driver side. I'm not real thrilled with modifying the bolts like I did, So I went to my main AMC source, the message board. One of the members has exactly the knuckle I need and with shipping it was very reasonable, I will be pulling the driver side apart again to fix this right.
February 21, 2013
The last thing I had to do for the drop plates project was to put the wheels back on and give it a test drive. The first thing I noticed was my headers, mainly the passenger side, hit even worse than before, well DUH! In the plans for this car was the elimination of those headers so that plan will move up. Before the drop swap the center of the front wheel fender opening was at 26.375", its now at 24.75" or a drop of 1.625" as advertised. The car has a badass rack to it now, a very cool look. But a slight drop in the rear would be nice. I will investigate some lowering blocks for the rear.
February 23, 2013
As usual things with the lowering plates have not worked out well. While the car looks awesome this modification did move the wheels out 3/8" on each side. I took the car to a cruise-in this morning and standing back from the car I noticed the passenger side wheel had something hanging from the top. As I got closer I saw the tire had hit the fender roll and pulled it down. There was also a cut in the tire. As I backed out of my driveway I did hear something hit which I assumed was the header hitting, maybe it was but in addition I have tire clearance problems. Its déjŕ vu all over again, think back to the Z 5 lug conversion! This time its on the front fenders. I have three options. Remove the drop plates, that's not going to happen. Get wheels with a larger backspace, that would be nice but options are very limited. Or roll the fender lip. This car has over an inch of fender roll so I think that is what I will do. I will think this through a lot before attempting it. Right now I'm thinking of making some relief cuts into the roll and bending the metal up, I only have to do this on the top portion of the fender, about 12" - 18" of it.
February 27, 1013
After extensive research I have given up trying to find any 7" wheel with a backspace of 4 3/4" or bigger. To get that backspace I would have to go with an 8" rim which would put me right back where I am now with relation to the fender. So I decided to roll the fender lip! Rather than roll the whole fender lip I just rolled from the center of the wheel well 12" forward and backward where the tire could possibly contact the lip. This time I used a bit more logic to this and made relief cuts to make rolling the metal easier and less stressful on the fender. I used a air saw to do this which worked great. After I rolled the fender lip I applied some POR-15 to prevent rust and filled the curl with polyurethane so no debris will collect.
March 1, 2013
With the POR-15 and polyurethane spread and dried I put the wheels back on, clean up the car and took it for a test drive. It looks like the tire clearance has been solved but I need to take care of the exhaust. I'm making grooves on my driveway!!!! I guess that will be the next project. OH what fun, I just love working on exhaust!
March 4, 2013
While I was at the monthly Caffeine and Octane cruise-in Sunday I got to talking about the installation of my spindle drop and my front tire interferance. I mentioned it would be nice to modify the steering knuckle so you wouldn't have to gain the 3/8" of track width. One of my Z buddies told me about a weld/fabrication shop just up the road from me that could probably do this. So today I took one of the knuckles to him to see if its possible. The first question he asked was what material is the knuckle made from. If its cast iron it can't be safely welded. If its cast steel he could do it. He will test an old knuckle I have to see what the material is since I don't know. The other option is to make custom knuckles using his CAD and C&C machines. He will contact me with the answer to the material and give me a quote on the custom knuckle.
March 18, 2013
You can't be too prepared with these old cars on road trips even if the trip is short. I've needed tools and parts I carry in the Z before and there was that brake issue with the AMX. There is nothing more depressing than being stranded simply because you don't have tools or a few spare parts. So like with the Z I made a tool box for the AMX. The box will be big enough to hold the jack, a few wrenches and sockets, along with some spare parts. It will sit in the left side of the truck, under the fender. The floor is not flat in this area so I used my tape and fiberglass method to make the contoured bottom of the box. The sides are made from 1/8" fiberglass, aluminum angle was used to rivet the sides and bottom together. The top is .063 aluminum and is held on with dzus "D" fasteners. To make it look more professional I covered it all with black vinyl.
March 27, 2013
I was talking to someone about changing my exhaust to the later '71 401 engine freeflow manifolds and mentioned I needed to get them sand blasted. He told me about a shop close to me that could not only blast them but ceramic coat them. I took them up to Evans Performance today. The cost is $160 for V8 manifolds with a choice of colors, I decided on titanium. Polished style is another $30 but I'm not going that way.
April 1, 2013
I picked up the manifolds today and they look awesome. I tried dry fitting the manifold, donut gasket and the flanges but have run into a problem. I got the wrong donuts for these manifolds. The stock 390 '70 AMX uses a 2" exhaust while the free flow ones use 2 1/4". I will attempt to get the correct donuts but then the exhaust pipes I have are 2" and that could cause another issue.
April 2, 2013
I was able to get 1971-91 AMC 401 donuts Fel-Pro EG24027 that fit perfectly. But of course the 2" down pipe flares are not wide enough the really sit correctly on these donuts. Not a huge issue, I knew they were not going to work without modification anyway. I will have to get the exhaust installer to make those.
April 3, 2013
Seemed like a simple task. Remove the headers in preparation for the free flow manifolds. Three hours later and one saws-all blade they are out. The driver side was simple, just raise the car high enough and it basically fell out. The passenger side was another story. Starter is in the way, suspension parts are in the way and raising the car did not help. I had several choices but decided to just cut the damn things out. They are never going back in and aren't really in good enough shape to sell. I thought the exhaust in the car was stock but it turns out the pipes are 2 1/4", that's a good thing. All I will need the exhaust guy to do is make the down pipes and connect them to the existing pipes. I like the sound of the mufflers on the car so I won't change them. So I won't be needing the 2" exhaust I bought. I guess I should have researched this a bit more than I did!
April 4, 2013
I got the manifolds on. I can't say that was easy, these things are heavy for an old man to handle while trying to start a couple bolts to hold it in place. I ended up putting a stud in the back to help support it until I could get some bolts started. As usual I got interrupted when I noticed a drywall screw sticking out of one of the rear tires! No clue where I picked that up, thankfully it didn't go flat on the road, its not like I have a spare tire! I took the tire to Kauffman's to get it fixed but they told me because of how close to the edge of the tire the screw is they can't fix it. Damn, there is less than 1000 miles on that tire! My plan was eventually to change the rear tires to a bigger size, maybe I'll just do that now.
April 5, 2013
A little research made the tire issue even more confusing. Seems like the tire industry has determined any puncture within an inch of the outside tread is dangerous to fix so no reputable tire shop will do it fearing liability. Consensus on the AMC board is go ahead and fix it, just keep an eye on it and don't do any burnouts! Seriously, stress could cause the tire to fail. I used the rope patch kit and fixed it. For now I will run it but if I decide to take it on a long or even high speed trip I will replace the tire. Sure don't want to trash the car for the price of a T/A.
April 10, 2013
A small hand injury took me away from the car for a few days. This afternoon I pulled the car out of my back garage in preparation of getting it towed to the muffler shop on Monday. They will make the down pipes which will finish the exhaust. Man, was that thing loud when it fired up in the garage. I think a couple squirrels fell out of the trees!
April 15, 2013
The flatbed tow truck came to the house promptly at 7:30 this morning to haul the car to the muffler shop. It only took a few hours since all I was having done was the down pipes. The rest of the exhaust is in good shape and I believe the mufflers are Flowmasters. They did a good job, however I apparently did not. There is a massive exhaust leak, which appears to be the driver side manifold center flange. I guess its back into the garage for retrofiting. This time I will be using copper one piece gaskets instead of the three individual cheap ones I used. Some day I will learn about using cheap stuff! But all this will have to wait since I am leaving town for a few days.
April 16, 2013
While I am waiting for the copper gaskets to come in I pulled the manifold. Turned out it was not the center flange but the rear one that was leaking. There were two blow out marks on the gasket when I pulled it. I checked the manifold for straightness, it was perfect, and also rechecked the head for any left over debris but did not find any. That rear flange was the hardest one to get tightened so I will be more careful when I install the new one.
April 24, 2013
I'm so depressed! I was out of town for several days and got back to the manifold issue yesterday. While I was tightening the manifold bolts one of them snapped off! Pretty sure I did not exceed the 30-35 foot pound spec for these bolts since I was using a 3/8' ratchet and I'm not that strong! Fortunately I was able to get it out with an easy-out.
April 27, 2013
After two attempts at sealing these manifolds and since I already snapped one of these "special" AMC bolts I have switched to grade 8 bolts for this install. It all went back one with no problems so I am declaring the exhaust job done.
Now that the exhaust issues have been solved I am moving on to more fun stuff, like handling. Back in 1970 I thought these cars handled great. Well maybe they did in 1970 but that was 43 years ago and that is not the case today. I think my Ford Ranger handles better....to a point! Lowering the car was good but there is still substantial body lean. Some intense internet search came up with many options. Some were rather expensive and since this is still basically a street car I decided to upgrade with sway bars and shocks. AMC Enterprises has what they call their Super Street Package. It consists of a 1 1/8" front sway bar rated at 435-inch pounds, almost twice the stock bar and a rear sway bar rated at 225-inch pounds. I decided not to go with their gas adjustable front shocks but went with KYB gas shocks front and rear. Its all designed to get rid of the 29 degree body roll the 1970 AMX has and gives near neutral balance front-to-rear. I know the addition of a bigger front bar on my Z made a huge difference in its handling, I am expecting the same for this change. The front looks like a simple bolt one, the rear takes a bit more work.
April 30, 2013
Simple bolt on? Nope, not ever in my lifetime, LOL. The shocks had a bit of a trick. The FSM doesn't mention you need to raise the control arm to get to the inside lower mounting nut. Not a big deal, took those off and the tower mounting 3 nuts and two bolts and the whole thing lifted out. One nut holding the tower mount to the shock and they were free. The installation of the new KYB shocks was just reversing the removal procedure. The sway bar proved to be a slight bit more of a challenge. Getting the end links and the mounting brackets off was easy but there is no way to get the bar out. When all else fails read the instructions! I have to pull the pitman arm to get the bar out. Then the instructions mentions step plates that I must reuse.......I have no step plates! MAN, its always something!
May 1, 2013
In response to my post on the AMC board about the step plates it turns out the 70 and newer models did not have the step plates...............great. The brackets on my car are bent to conform to the frame. I was able to bend the Gymkhana brackets so the ears and the bushings will sit flat against the frame. Now I have to get the nerve up to pull the pitman arm to get the old bar out!
May 2, 2013
I bought a pitman arm puller, very cheap. I used a big crescent wrench to remove the nut and pulled the pitman arm loose from the steering box. I was able to swing it out of the way to get the old bar out and the new bar in. I also had to buy a 1 5/16" socket to tighten the bolt for the pitman arm, just did not want to tighten it with the big crescent wrench. I struggled a bit getting the end links attached to the A frames, amazing how strong a 435 inch pound bar is when you try to maneuver it. The bar main frame bushings were another struggle. I ended up elongating the slotted holes a tiny bit to better line up the bolts holes on the frame. The hardware supplied with the bars is trash. It all might have been grade 5 maybe but the washers just bent trying to torque the bolts to 25 ft/lbs, I used some grade 8 washers I already had and the stock AMC bolts. But its in now, test drive will have to wait a couple days though.
May 8, 2013
The week long torrential rain has finally let up for a few days, the side yard sort of dried up so it time for the test drive. The front bar an shocks made a difference for sure. Not as much as the Z conversion but still noticeable. I will now move on to the rear bar and shocks.
May 11, 2013
I jacked the rear of the car up, pulled the rear shocks and installed the new KYBs. Not all that easy but I got them on in just a couple hours. However before I attempt to put the rear sway bar in I am going to clean up the rear end. There is a lot of rusty stuff, grease and who knows what. Not sure how I'm going to tackle that yet. I probably should have done this before I put the new shock in! I also put some new exhaust tips on. They still look like the stock tips but are 3" instead of the 2 /12" that were on there. They make the rear look a bit more aggressive.
May 13. 2013
While I was under the car changing the shocks I noticed a valve looking thing that seemed to be hooked to the fuel tank. Posted a question on the AMC board about what it was. My car was originally sold in California and that is the California only fuel tank vent valve which is supposed to be plumbed to the engine. There was supposed to be a hose fitting in the valve cover which hooks to the hard line on the firewall. The valve covers that were on the car did not have a fitting and of course the Edelbrock covers I'm running now don't have it either. I do have the hard line on the firewall. It was suggested to use a hose to connect the hard to the air cleaner base so that's what I have done. Even though I don't live in Cali having a properly vented tank is a good thing.
May 20, 2013
In preparation of installing the rear sway bar I needed to clean up the rear axle assembly. I thought about pulling the whole assembly out of the car but decided that would be a project for another time. I noticed a diff code of "C" stamped into the housing indicating the gear was a 2.87. That does not coincide with the speed and RPM readings, looks like the previous owner changed the gear ratio from stock. I slapped some POR-15 silver on the differential and the axle tubes.
May 21, 2013
Not much was accomplished today. I got the brake line raised up off the axle tube as per the instructions but that was it. Going over the supplied hardware that came with the sway bars I noticed I did not get the bolts and nuts that attach the end link brackets to the frame. No big deal, they would have been grade 5 and I would have gotten grade 8 anyway. I also noticed one of the long end link bolts had the treads messed up right at the end, but I was able to run a thread die over it and fixed it. So I am ready to install the rear bar, as soon as I get the courage the drill the frame!!!!!!!
May 22, 2013
Man, once again a part I have bought doesn't fit as advertised. I started putting the rear sway bar on this morning. All went pretty well until I tried putting the end links on. The instructions say to have the bar ends parallel to the frame and the links vertical. These end links are way too long. There was some discussion about this on the AMC board and the ones I have a 11' long and should be about 8". I called the supplier and he was rather evasive, saying some wanted long and some wanted short. He suggested I get new bolts and cut the tube to fit. Hmmm, seems like he should provide that. But I let it slide since the bolts are not that much.
May 28. 2013
With the weather getting warmer in Atlanta I've noticed the car running a little hotter than usual. I have decided to upgrade the radiator to an aluminum 3 core from Champion. This is the same company that made the fans I already installed. I had to modify the radiator mounting bracket a little, cutting about 1/2" off the bottom passenger side corner, to get it to line up. I also added a stainless steel expansion tank.
June 5, 2013
Ever since I put the new carpet in I have wanted to get the windows tinted, especially the rear window. Sun will turn a black carpet brown in a short time and the Georgia sun in summer is brutal. So today I took it up the street to have the max legal treatment done, that's 35% in Georgia. Its amazing what a small thing will do to a car. The dark tint looks awesome against the golden-lime paint.
June 18, 2013
I installed lowering plates a few months ago but am not happy with the 3/8" they add to the front track on each side. After several months of waiting I picked up some modified steering knuckles from Fat Cat Fabrications. Fat Cat does awesome work but they are not cheap! Then again do I really want cheap work on a critical front end part, I think not! Chad made pieces to weld into the sides of the knuckles and drilled them to accept the spindles 1 5/8" higher than stock, thus lowering the front end just as the lowering plates did. But these new knuckles will eliminate that added width. I got new ball joints since I really don't know how old the ones on there are and I have to pull them anyway why not change them. While I have all this stuff apart I have painted the control arms, knuckles, strut rods, the steering linkage and the rotor baking plates. I may not put the rotor backing plates back on. I never really understood why they were ever put on cars anyway. Its not like they really protect against anything.
June 20, 2013
Once again I have proved I am NOT an engineer! All was going great on the first modified steering knuckle install. I got the new ball joints on, but when I started to put the steering arm back on I had a problem. On the lowering plates there are two tapped holes to fasten the plate to the knuckle. But the front one of those tapped holes also attaches the steering arm. Since I didn't think I needed them I did not have those tapped holes added to my modified knuckles. I will have to pull it all off to drill and tap that hole. That steering arm is very close to lower front spindle bolt head, I think I have clearance, it should since its in the "stock" position.
June 21, 2013
Discretion is the better part of valor, something I rarely adhere to. But this time I will. I measured and marked the spot to drill and tap this hole but have chickened out and took the knuckles to my fabricator. There were several motivations for not doing this myself. 1: If I am off by even a tiny little bit I am screwed, there is no room for error in this. 2: I don't own the correct tap, or the correct drill bit for the tap. 3: My drill press is a cheap one, not really made for this type of work. 4: I have no good way to hold the knuckle in place to drill it. 5: My fabricator has the jig he made to modify the knuckles and can use that for proper alignment. He said he can have it done this afternoon so I can get back on this project this weekend.
June 22, 2013
Chad drilled and tapped the holes for me......no charge, ya gotta love that. This afternoon I installed the driver side. Not as easy as I thought. I had to relief the steering arm where the lower front and upper back bolts for the spindle fit. Not that much, maybe a 1/16". Since those bolts need to fit from inside I had to cut them to length so they would not interfere with the brake rotor. If I had 3 1/4" bolts I would have been fine. I still need to torque everything, reinstall the strut bar and the sway bar.
June 24, 2013
Got everthing torqued, strut bar and sway bar back on the driver side and took apart the passenger side. I made the same relief cuts on the steering arm. I cleaned up everything and painted the caliper mount, strut and the steering arm. Assembly to follow.
June 25, 2013
For some unknown reason I don't have the proper length bolts for this side's spindle. I picked up 4 new ones and got everything installed. Well, almost everything! The last thing I have to do is hook up the tie rod end link. It seems like I may have gotten overly aggressive getting this one out and the threads are messed up. While tightening the nut the whole ball joint started spinning and there is nothing to get hold of to prevent that. So I ordered new Moog end links for both sides from Summit.
June 27, 2013
For the first time ever Summit did not come through. The end links are back ordered and will take two weeks, I canceled that order and ordered them fro Rockauto. Rockauto's price was cheaper than Summit by $3 each and the shipping was $4 less, I should have checked there first. So this project is on hold for a few days.
July 2, 2013
The tie rod end links came in from Rockauto and I installed them with no further issues. But I will need to get a front end alignment since I replaced so many suspension components.
July 5, 2013
I finally got back on to the more difficult part of this Gymkhana Suspension upgrade, the rear sway bar. Anytime the instructions mention drilling holes its just scary! The end link bolts and spacers that came with this bar are way too long. As I said above I called the dealer and he was less than helpful. The plan was to get some shorter bolts and temporarily install it all with the mounting brackets in position and then after I am happy with the bar's position I will cut spacers that came with this bar to fit. The instructions said to have the bar parallel with the frame and the end links vertical to that. After getting everything positioned right it turns out I don't need any spacers at all. Its all very confusing but it seems to work fine. Deciding where to drill the holes was tough but with the help of my buddy Gregg we managed.
July 16, 2013
Two weeks of rain here in the south has prevented me from getting the car to the alignment shop. In the mean time I have continued sanding on the hood. I have 99% of the defects out but still have scratches. I have used 3000 grit but still can't seem to get the paint perfect. Using a buffing machine and cutting compound is not helping, probably lack of experience. The sanding seemed to get it to a semi-gloss state but after waxing it the gloss came back. But I am calling it done for now. maybe later I will attempt sanding all the paint off and start from scratch.
July 17, 2013
The rain has given us a break and I was able to get the car to the alignment shop. They got everything back into spec and "fixed" the passenger side tire hitting the fender issue by adjusting the strut arm. I put a few miles on it but really can't tell how much affect the rear sway bar has yet. All I know is with all the suspension upgrades the car handles much better than when I got it.
July 21, 2013
A couple long trips have been uneventful, it appears everything on the suspension modifications is working as expected. Now my only complaint is the crazy light power steering. The plan is to get a Saginaw pump which allows for shims to be added to the prussure valve reduce boost to the steering box. This will make the power steering less sensitive and give more road feel.
August 1, 2013
I have already installed a Group 19 front spoiler to the car. But it just looks like its missing something. Having it extend to the end of the bumper and curve around the sides to blend in with the fender bottom edges like the Mach 1 Mustangs had back in the '70s would finish the look. I have done a lot of fiberglass fabrication and its never as easy as you would think. Once again I used my tried and true method of taping off the car and applying fiberglass against aluminum taped over cardboard as my template. This gets me the basic fitment so I can fine tune off the car. The toughest part was getting the side pieces to line up with the existing spoiler. After I had them as close as I could I glued the ends of the side pieces and the end of the existing spoiler with 3M 08116 panel adhesive, added fiberglass to the backside, blended them with Rage Gold, sanded it all smooth and painted the whole thing semi-gloss black. It was a lot of work, much of it trial and error but I think it just looks better.
September 6, 2013
I have noticed since I replaced the headers for the freeflow manifolds the driver side seemed to have an exhaust leak at the muffler. As it turns out the muffler has come apart inside. So I took the car back to my exhaust guy to get some work done. I had him change both mufflers to Magnaflows, install new tail pipes, weld on my new stainless tailpipe extensions and get the passenger side sitting correctly so it no longer hits the rear shock. Also I had them move the e-brake cable that was on the wrong side of the tail pipe.
September 26, 2013
I have removed the hood insulation pad. It wasn't in that good of shape and I like to hear the engine sound. But its removal did uncover the ram air ducting which in itself is pretty ugly. I have made some aluminum sheets to fit into the recesses of the hood to ride the ducting, painted it black and screwed it in. Another beautification effort is some stainless fender to radiator support rods. These look really nice and weren't all that expensive. I am totally wearing out the battery cable by removing it every time I work on anything electrical. So I added was a battery disconnect.
October 6, 2013
Anyone following this website knows I am more of a resto-ride guy than a purist. I modify my cars to suit me.....period and make no apologies for what I do. The '70 AMX went with a clear color turn signal light lens. The '71 and newer Javelins used an amber lens, I like the amber lens more. I was at the AMO regional show this weekend and someone had some amber ones for sale and I bought them. They are not in perfect shape but really neither were my stock one and I like the look.
October 7, 2013
I picked up a Mallory Promaster E Series ignition coil for a bit more performance but mainly to clean up the top of the engine for a future project. I made a bracket and mounted it on the frame rail just in front of the drivers shock tower. Wiring proved to be simply tying the positive coil lead to the stock +12v from the tach with the red wire from the distributor and the negative coil lead to the green wire from the distributor.
October 9, 2013
I bought a chrome alternator but don't like the alternator bracket I have on the car now mainly it really isn't all that strong and is hard to adjust. I think maybe there are some support parts missing on this setup. So I have redesigned it using a turnbuckle for the adjustment and two extra brackets on the rear for additional support. To accomplish this I cut off the slotted adjustment portion and welded an additional flange to the bottom of the existing bracket to mount the turnbuckle. This also allows me to swing the alternator more away from the oil filter during adjustment. It has been taken to Pro Plating for chrome plating.
October 21. 2013
I have been debating with myself for a while now about changing over to a serpentine belt system or just keeping the v-belts. I have decided to stay with the v-belts but updated to CVF Racing billet aluminum pulleys for the crank and water pump. Of course as with all after market stuff it wasn't a simple bolt-on. The crank pulley went on fine except CVF sent the wrong size bolts, he is sending the correct ones. The water pump pulley however required a series of three .100" spacers to keep it from hitting the water pump and to align the belt groves with the crank groves. It took me three attempts but finally ended up with a .300" spacer to get it sitting right. In addition to the water pump not lining up the shaft was either bent or the fan mount was never welded on straight. So I optioned to get a new pump.
October 26, 2013
In an attempt to further help the handling of this car I am adding a front shock tower brace. I searched but apparently nobody makes one. I have seen a couple home made ones at car shows and on-line but they looked poorly implemented, relying on thin sheet metal or weak looking brackets, appearing more form than function. I used 1/8" plates with a gusset running the whole length for strength and welded those to the shock tower mounts. This will give me room to run a bar across the engine bay just in front of the carburetor and below the ram air pan. On the bottom of each plate I have welded a bracket that will house a 3/8" heim joints which will allow easy adjustment. The bar itself is 7/8" solid 6061 T6 aluminum drilled on each end to accept the heim joints. This was certainly a lot of work but with uni-body cars being what they are, more structural rigidity is a never a bad thing. Plus it looks cool and it was fun to create it.
Novenber 7. 2013
I finally got around to installing the new Gates water pump and its CVF billet pulley. Like most things automotive all water pumps are not created equal, in this case that is a good thing. This water pump is about .200" longer at the pulley flange so I only had to use one of the spacers I made to align the crank and pump pulleys. But of course that threw off the power steering pulley, I had to add a few washers to get it aligned. One of the socket head bolts the PO had used to install the water pump was too short for this new pump so I had to get a new one, no big deal. I had already swapped out the top radiator hose and took this opportunity to change the bottom one.
November 8, 2013
I got my alternator bracket back for the chrome shop today and it looks awesome. Too bad most of it can't really be seen, LOL. But installation required some tweaking. Because of the new billet pulleys I had to add some spacers to move the bracket out a little for alignment.
November 15, 2013
Ever since I've owned this car there has been an intermittent fuel leak, usually when it first starts. I took apart the braided fuel lines and retightened all the fittings but the leak persisted. I have replaced these lines with a combination of hard lines and hoses, locating the fuel filter away from the engine instead of having it sit on the intake as the previous owner had it.
November 18, 2013
Now that I have the front drop done I want to address the ridiculously super light power steering. In an effort to improve the power steering feel on the car I am switching from the stock Eaton pump to the newer Saginaw pump. The main reason for the switch is the Saginaw pump output pressure can be adjusted by adding shims under the pressure regulator valve. This will make the steering much less sensitive and give more road feedback. Stock pressure with no shims is 1250 psi, I added 5 shims to drop it to 750 psi. I found the necessary mounting bracket that someone had already polished to install the new pump. Of course the bracket that mounts to the block and head needed some relief due to the cast aluminum valve covers sticking out further than the stock sheet metal ones. Since AMC mounts the pump from the back it leaves three of the four mounting holes to mount a homemade tension bracket made from a plate with a 1/2" square hole to use a 1/2" breaker bar to pull on while tightening the belt. If I don't want to leave it on the pump its easy to remove. I want a chrome pump but it seems nobody makes one for AMC cars or Jeeps. A Chevy pump would work but the low pressure hose would interfere with the mounting bracket. A friend just happened to have chrome Chevy reservoir that he gave me. I cut off the hose fitting, had that hole brazed shut drilled a new hole for the AMC hose location and had some 3/8" brake line welded on. The next issue was not having the two AMC mounting studs for the pump. AMC uses two rear mounting studs that are longer than the Chevy studs. After an exhaustive search I found longer studs used on the 67-70 GTO Judge, cool. Instead of the mounting threads only being 13/16" long these are 1.00". After all this the belt from the old setup is much too short. I ended up with the RoadMax belt 15525AP which is 3/8" wide and 53 1/8" long.
November 22, 2013
One issue I had after this conversion was a leak on the high pressure hose at the steering box. I had reused the stock high pressure hose thinking that since it didn't leak before it should be fine....WRONG. After pulling the hose out and inspecting the flare I noticed a nick about 1/16" wide right at the edge of the flare, that would cause a leak. I picked up a new hose hoping that would fix the leak, it didn't. After some searching on-line I discovered they make thin copper gaskets made for inverted flare fittings. I picked up some 1/2" outside diameter ones which is what you need for a 5/16" flare and installed one. So far it looks like I may have fixed the leak. If not I guess my next move is a new steering box!!
December 6, 2013
Just when you thought it was safe to go back in the water............... Well the power steering leak was not only the high pressure hose connection. It seems trying to weld brake line for the return line just doesn't work all that well, too much lead content in a standard brake line. So its back to the drawing board. This time I used some panel adhesive to attach a 1/8" plate inside the reservoir with a 1/4 npt nipple screwed into it. A 1/4 npt locking nut with an o-ring was attached on the nipple on the outside of the reservoir. The panel adhesive and the o-ring should make it all leak proof and strong, hopefully. After the pump was together and the AMC pivot bracket was in place I screwed on a 45 degree 3/8" hose fitting to the other end of the nipple.
December 16, 2013
All this seems to have worked, the leak is gone and its all functioning as I hoped. Now that is done the question is was it worth the effort. The steering is for sure not as light and I like that. While it certainly doesn't feel like a modern rack and pinion it is much better than the stock setup. It was a lot of work and was not a cheap conversion by any stretch, but the new polished bracket, pump and pulley add some bling and I like the feel, so yes I think it was worth the effort.
January 3, 2014
This car had the factory Ram Air setup when I got it. I removed the exhaust manifold snorkel, blocked off its hole in the air cleaner pan since it wasn't hooked to anything. I also removed the flapper door in the Ram Air inlet so all the carb's air comes through the hood scoop. But the foam gasket on the inlet was trash and after seeing how the newer Javelin's Ram Air is setup I decided to change a few things. To make the seal for the pan to the Ram Air inlet I got the seal for a '69 Chevelle and cut it to the right length to fit inside the pan. I used some aluminum inside wrapped over the seal and screwed to the pan from the outside to keep it in place. I made an aluminum plate for the inside of the hood around the Ram Air inlet, this new seal will sit against this plate when the hood is closed insuring all the car's air come through the Ram Air.
January 9, 2014
When I swapped out the stock painted fender braces for polished stainless ones I was thinking the brackets that hold the top of the grille would look cool in stainless too. I searched but could find any. So I Emailed MMS & Accessories, the people who made the fender braces, to see if they made them, they did not. But John told me if I sent my stock ones as samples he could make them in stainless. The new brackets came in today and they look awesome.
January 24, 2014
A problem somewhere in my rear diff or axles or both has reared it ugly head. There is a grumbling sound that seems to be coming from the passenger side rear wheel. In addition if I accelerate even moderately hard that wheel seems to"let go" with a rather alarming sound. I'm thinking I have the infamous AMC two piece axle issue. AMC used a hub at the wheel end of the axle that is held in place with a keyway, a weak link for sure. The hub is attached to the axle with a 1 5/16" nut with a torque spec of 250 ft/lbs. I pulled the wheel and started to remove the nut. I was shocked how easy it came off, certainly not on at 250 ft/lbs. In addition there is about 1/4" of front to back play in that assembly, while the driver side has no play. It looks like the bearings are shot which would explain the noise I hear. I still have some investigating to do. With these two piece axels being such a weak link I will have to decide if I want to rebuild all the antiquated technology or just upgrade to Moser axles. The other option is to upgrade to a Ford 9" setup. Since this is going to involve a lot of changes this thread is moving to Rear End Upgrade for updates.
January 31, 2014
When I bought wheels and tire for this car I decided to stay close as I could to stock. I got 15" repo Magnum 500 wheels and 215x65-15 B.F. Goodrich T/A radials. It all works fine but I want larger tires on the rear to make it look more menacing! It just so happens my Ford Ranger needs rear tires and they are the same size as I have on the rear of the AMX. So I have picked up 235x60-15's for the AMX and since they are practically brand new I put the old tires on the Ranger. The difference in new vs. old tire size is 0.1" taller and almost 1.0" wider. The slight difference in height won't affect the speedometer much in the AMX.
June 24, 2014
At long last I have brakes I am confident in. The car stops like it never did before and that scary brake pedal to the floor thing is gone. The only disappointing thing is after all this work and expense it is all hidden behind the Magnum 500 wheels. So unless I point it out nobody will know I have four wheel upgraded disc brakes. Do I see new wheels in the future?.....possibly.
July 5, 2014
When I first got the car I noticed the hood sort of wiggled when you opened it. I thought the driver side hinge was just worn out. I saw a set of hinges for my car at a good price plus they were powder coated in chrome. The chrome finish was a plus that would look good with some of the other shiny pieces I have upgraded in the engine bay. I recruited my usual helper Gregg to help swap out the hinges. We pulled off the hood and removed the old hinges, installed the new ones and replaced the hood. Our first attempt at alignment was very close but when I opened the hood the first time that wiggle was still there, that was confusing. We played around with trying to get the hood aligned better but weren’t getting very far, in fact all of a sudden it took a turn for the worse. The driver side rear would not sit down even with the top of the fender. A little investigation revealed the rear hinge nut or stud had somehow gotten stripped and would not fully tighten causing the hood to rise up in the back when it was closed. We gave up for the day to go watch NASCAR!!!!!
July 6, 2014
Today Gregg is out of town so I am left to solve the hinge issues on my own. The first thing was to figure out if the hood stud is stripped or the nut is stripped. Looking at the stud it appeared that was the issue. I have a good tap and die set but did not have the die I needed. I was thinking I would just change the threads on the stud to a more common size I had when I found a fine thread nut and bolt combination in my collection. Just for grins I put the nut on the hood stud, it fit and tightened completely, go figure. I closed the hood, raised it, the wiggle was gone and the rear of the hood aligned with the fender top. I spent a good amount of time trying to get perfect gaps all around the hood but eventually settled for “close enough”. So apparently there was nothing wrong with the old hinge, just that nut not being tightened properly. Oh well the chrome looks cool. So apparently there was nothing wrong with the old hinge, just that nut not being tightened properly. Oh well the pseudo-chrome looks cool.
July 20, 2014
It has been nice to just drive the car instead of working on it. But I decided I need a passenger side door mirror. I scored a couple mirrors off EBay hoping I could at least salvage one good one out of the pair. Fate stepped in while I was attempting to remove the pedestal that holds the glass, the glass simply fell out and did not break . This mirror had good glass, the other mirror’s glass was trash. The bad glass housing was the best of the two and the swivel was good and tight. I have discovered one thing, it’s very easy to remove the pedestal if there is no glass. So I broke the trashed glass, cleaned up the pedestal, painted the housing head black and glued the good glass in place. To mount the mirror to the door I used nutserts like I did on the driver door.